


FastStone Freeware
Image Viewer 8.4 & PhotoResizer 4.5
Released 29th May 2026
Like its sibling, FastStone Capture, FastStone Image Viewer has a beautifully designed interface, which is intuitive and easy to use. Like Google’s Picasa2, it can be used to browse the images on your hard drives, and like IrfanView it can be used to apply special effects, adjust colours, resize images, convert file types, etc. It is free for home use, but $34.95 for commercial use (compared to only €10 for IrfanView).
New in Version 8.4 (May 29th 2026)
- Added support for PDF format, including the ability to view multiple PDF files in the Compare Images tool
- Added support for JPEG XL (.jxl) format
- Other improvements and bug fixes
New in Version 8.3 (December 1st 2025)
- Fixed a bug in Draw Board where drawing lines and arrows could create unwanted pixel noise
New in Version 8.2 (November 21st 2025)
- Added ZIP Archive option to the Create menu, allowing you to compress selected files into a ZIP file
- Added shortcut Ctrl + 0 to reset image zoom to 100%
- Reintroduced Update file timestamp option in the Save dialog
- Restored [File index / Total files] information beneath the Preview window, after the filename
- Improved handling of long file names
- Improved support for multi-monitor systems
- Improved email support for Unicode file names
- Fixed a reliability issue affecting batch conversion of HEIC files to other formats
- Optimized the shutdown process so the application closes more quickly
- Keep file selections highlighted in Details and List views even when the application is inactive
- Other improvements and bug fixes
New in Version 8.1 (July 31st 2025)
- Improved Open and Save dialogs with a modern style
- Displays current file position and total files in menu toolbar
- With “Select files manually” option in “Import Photos and Videos,” you can choose to display either filename or date time beneath the thumbnails
- Provides native read/write support for WEBP images
- Faster HEIC/HEIF thumbnail generation
- Enhanced video thumbnail generation
- When batch-renaming HEIC/HEIF images by date/time, EXIF “date taken” is used when available
- Fixed a bug where files couldn't be dropped into folders that are symbolic links
- Other improvements and bug fixes
New in Version 8.0 (April 28th, 2025)
- Added two larger thumbnail sizes to Settings
- Added Keep Settings option to Adjust Curves and Adjust Levels
- Add a Title option to Image Strip Builder
- Simplified the Save dialog interface for the Scan tool
- Enhanced handling of longer filenames and paths
- You can now rename a file by changing only the case of its letters
- Other improvements and bug fixes
New in Version 7.9 (October 17th, 2024)
- Added Japanese language support to the software interface
- Enhanced window capturing on Windows 10/11
- Increased maximum font size to 200 in Draw Board
- Fixed a compatibility issue with the Windows 11 24H2 update that could cause application crashes when accessing network folders
- Other improvements and bug fixes
New in Version 7.8 (September 28th, 2023)
- Added “Search by Name” to toolbar above thumbnail browser
- Added drag-and-drop functionality to viewing panel. You can drag and drop image or video files from external sources (e.g. Windows File Explorer) into image viewing area to view files directly
- Added Shadows and Highlights to batch conversion tool (Advanced Options -> Adjustments)
- Added Contrast and Gamma options to Scan Board
- Added keyboard shortcuts to change “Auto Image Size” option. Press Ctrl+Shift+K for “Auto Fit” Press Ctrl+Shift+L for “Lock Zoom Ratio.”
- Added more options to “Mouse Click” in Settings window
- Added “Load from File” and “Save to File” in Settings window
- Added support for AVIF format
- Presets in Resize tool are customisable
- Moved Rename tool to a higher position to avoid covering the centre of the image
- Enhanced Draw Board:
- Added Text with effects (curve, outline and shadow)
- Added Emojis
- Added preset colour lists (click * button to select a preset colour)
- Flip/Rotate image objects
- Zoom In/Out ranging from 1% to 5000%
- When editing text, press Ctrl+Del or Ctrl+Backspace to delete an entire word
- Enhanced PSD format support
- Enhanced Wallpaper support on Windows 10/11
- Improved loading speed of Apple DNG raw files
- Fixed compatibility issue with iOS 17 when importing photos/videos from iPhone
- Many other small improvements and bug fixes
New in Version 7.7 (August 24th, 2022)
- Loads HEIC/HEIF faster by 40% to 100%
- Added "Show Dimension" option to Settings -> Thumbnail tab
- Added "25%" and "75%" options to the Quick Resize menu
- Added an option to Settings -> Programs tab to open external programs using Alt key instead of Ctrl key
- In Draw Board, you can now draw objects continuously without having to select the drawing tool repeatedly
- For Batch Convert/Rename:
- You can now customize the template list for filenames
- Added "Keep Screen On" option to the batch processing dialogs
- For GPS:
- Added a new GPS format DDD° MM.MMMM'
- Added "Show in Open Street Map" option
- For RAW files:
- Supports OM-1 ORF format
- Added "RAW Filter" option to Settings -> RAW tab. This option puts a filter on toolbar to show or hide RAW files with a single click
- When RAW files are hidden by disabling "View RAW files in" option in Settings -> RAW tab, you will have the following new options:
- Handle (rename, delete, copy, move) RAW+JPEG together
- Open RAW in external programs
- Improved text rendering quality in slideshow
- You can now rotate all pages in a multi-page tiff file with a single click
- Other minor improvements and bug fixes
New in Version 7.6 (March 31st, 2022)
- Used a new database engine for better performance, capacity, and reliability
- Added "Pre-scan folders into thumbnail database" tool under Settings menu. This tool can be used to get the thumbnails ready before visiting the folders/drives
- Added a rating system to classify files from 1 to 5
- Added 3 new sorting options: Date Taken, Rating and Tagged
- When copying or moving files, tags and ratings will be preserved in the database
- Optimized the program for reduced launch time, faster folder tree creation and network folder access
- Enhanced the 3 built-in themes: Bright, Gray and Dark
- File size of selected items shown in status bar
- In windowed view, merge two status bars into one to maximize viewing area
- Now you can shuffle images in current folder before thumbnail creation is complete
- Added an option (Settings > "Dual Monitor" tab) to select the secondary monitor when more than 2 monitors are detected
- Added "Center" option to Image Strip Builder
- Added "Preserve Aspect Ratio" option to Image Size in Design and Print tool
- Added hotkeys for Google Maps (Ctrl+Shift+M) and Google Earth (Ctrl+Alt+M) when current image has GPS coordinates
- Added "EXIF Lens Model" option to caption in Contact Sheet, text in Slide Show and text in Batch Convert tool
- Many other small improvements, including vulnerability and bug fixes
New in Version 7.5 (March 10th, 2020)
- Added dark (almost black) theme. Now there are 3 themes (Bright, Gray and Dark) under Settings menu
- Added support for audio formats, which can be enabled in the Video tab of Settings window
- Many other minor improvements and bug fixes
New in Version 7.4 (August 28th, 2019)
- Improved Clone and Heal. Transparent images are now supported
- Improved Pencil in Draw Board to draw smoother lines
- Fixed a bug that may crash the program when changing browser from details view to thumbnails view
- Fixed a Google Maps launch problem
- Other minor improvements and bug fixes
New in Version 7.3 (June 21st, 2019)
- Fixed a bug that caused copy and paste failure in Design and Print
New in Version 7.2 (June 14th, 2019)
- Supports FAX, JFIF and TS formats
- Improved processing speed (5X faster) of Batch Rename
- Fixed a bug that failed to load certain TIFF images
- Other improvements and bug fixes
New in Version 7.1 (May 28th, 2019)
- Supports HEIC and WEBP formats on Windows 10
- Added Lens Model to EXIF list
- Improved color accuracy when loading CMYK jpeg images
- Improved stability when processing corrupted or ill-intentioned images
- Other improvements and bug fixes
New in Version 7.0 (March 22, 2019)
- Supports monitor colour profiles. You can enable this option in the CMS tab of the Settings
- Supports different (bright or dark) skins for dual instances
- Improved compatibility with various scanners
- Fixed a vulnerability that may cause program to crash on corrupted or ill-intentioned images
- Other minor improvements and bug fixes
New in Version 6.9 (January 23, 2019)
- Added support for .M2TS video format
- Added shortcut (Alt+I) for showing File Properties
- Fixed Copy and Paste bug in thumbnail browser
- Other minor improvements and bug fixes
New in Version 6.8 (January 14, 2019)
- Added multithreading support to the built-in batch convert tool. Now it can process multiple images simultaneously (FASTER)
- Added Auto-deskew option to the scan tool
- Many other minor improvements and bug fixes
New in Version 6.7
- Improved performance of :
- Loading TIFF files
- Updating changes in current folder
- Activating magnifier
- Added "Magnifier + Zoom" and "No Action" to Mouse Click list in the Settings
- Added an option not to attach "_cr" to filename when saving files in Crop Board
- Added an option to use external file as the source image in Clone and Heal
- Updated RAW format library with CR3 support
- Improved support for Touch interface
- Other minor improvements and bug fixes
New in Version 6.6
- Improved performance:
- Load images faster
- Open big folders faster
- Copy / Move files faster
- Process embedded ICC profiles faster. Now embedded ICC profile support is enabled by default
- Added a new mouse gesture to image magnifier. When the mouse is in a magnifier shape:
- Press and hold down mouse button to activate the magnifier. Release mouse button to hide the magnifier
- Single click mouse button to zoom-in and view the image in actual size(100%). Now you can drag the mouse to view different parts of the image. Single click mouse button again to zoom-out and fit the image to the window
- Added a date range filter to photo importer
- Enhanced internal Video Player
- Option to auto-play current video file
- Option to loop current video file
- In fullscreen mode, auto-show play bar when you move the mouse
- Auto-show a hint of time position when hovering mouse on the progress bar
- Enhanced the batch convert/rename tool.
- Now # or * is not required in the filename template
- Now you can expand the canvas by pixels or by percentage
- Added Swap Colors under the Colors menu
- Fixed a DPI related bug in Contact Sheet Builder
- Other minor improvements and bug fixes
New in Version 6.5
- Enhanced the Import Photos and Videos tool. Now it allows you to import both photos and videos from cell phones, digital cameras and card readers. Previously, video files could not be imported.
- Enhanced the internal Video Player
- Increased the maximum time interval (from 5 minutes to 1 hour) in slideshow
- Other minor improvements and bug fixes
New in Version 6.4
- Enhanced the internal Video Player and Scan Tool
- Used Q as the shortcut key to tag/untag files
- Used Ctrl+Shift+D as the shortcut key to turn on/off preview on secondary monitor
- When Startup Folder is set to System Default, you will have an option to auto-clear history of visited folders
- Other minor improvements and bug fixes
New in Version 6.3
- Added an internal video player that:
- Remembers last position
- Auto-plays next video when current video ends
- Plays video in slide show
- Note: We do not provide video codecs. Third party codecs may be required for old versions of Windows
- Enhanced rendering quality of annotations in Draw tool
- Improved support for high bit-rate mp3 in slide show
- Other minor improvements and bug fixes
New in Version 6.2
- Batch processing dialogs can be maximized
- Supports mouse Forward/Backward buttons
- Supports F11 key to switch between full screen and windowed mode
- Improved algorithm for conversion to 1-bit color depth
- Improved memory management to handle larger images
- Other minor improvements and bug fixes
New in Version 6.1
- Improved loading speed of JPEG images
- Added support for ZIP-compressed TIFF images
- Added “Caption” option to the “Design and Print” tool. Now you can print properties such as file name, date/time, dimension below the images
- Added “"File name” option to the “Image Strip Builder” tool
- Improved print quality of text in the “Contact Sheet Builder” tool
- Other minor improvements and bug fixes
New in Version 6.0
- Improved the Straighten/Rotate tool. Now you can rotate and crop the image within the same window
- Added Auto Next Folder option to the Viewer tab of the Settings. This option lets you proceed to the next folder automatically when end of current folder is reached. Alternatively, you can press Alt + left/right arrow keys at the beginning/end of current folder to navigate into adjacent folders
- Added Remember Last Viewed File to the Viewer tab of the Settings
- Added two Zoom Filters (Lanczos_Softer and Bilinear) to the Viewer tab of the Settings
- Added Full Screen Preview to Crop Board
- Added Update File Timestamp option to Save As dialog
- Added Copy Image (Ctrl+Shift+C) to the right click menu on thumbnails
- Added Copy to Clipboard to Image Strip Builder
- Other minor improvements and bug fixes
New in Version 5.9
- Improved the Straighten/Rotate tool. You are now able to auto-rotate an image by tracing a line along the edge of a building or the horizon
- Improved drag-and-drop between dual instances
- Other minor improvements and bug fixes
New in Version 5.8
- Supports dual instances. Now you can run two image viewers at the same time, drag and drop images between them, and compare images from different folders side by side
- Added an option to show/hide filenames when comparing images
- Added right-click menu on EXIF list to Copy EXIF to Clipboard
- Displays MP4 and MOV thumbnails on Windows 10
- Updated RAW format library
- Many other small improvements and bug fixes
New in Version 5.7
- Improved Dark Skin
- Fixed some bugs
New in Version 5.6
- Added support for high-resolution / 4K monitors
- Optimized transition effects in slide show
- Improved compatibility with Windows 10
- Many other small improvements and bug fixes
New in version 5.5
- Fixed a bug that failed to display file properties in Batch Convert/Rename tool
New in version 5.4
- Added support for Unicode filenames throughout the software. Now you can view and process images named in different types of characters (e.g. Arabic, Chinese, Greek, Japanese, Korean, Russian ...)
- Added support for symbolic links
- Improved Batch Convert, Crop Board and Draw Board
- Many other improvements and bug fixes
New in version 5.3
- Optimised the program to support larger images
- Fixed a bug that might cause the program to crash when pressing W key to open the containing folder
- Other small improvements and bug fixes
New in version 5.2
- Now you can copy and paste objects in Draw Board
- Added "Zoom at Centre/Mouse Position" to the Settings
- Added "Smart-Filling" to the advanced options (Resize tab) of the Batch Convert tool
- Added Fit Width (Shift+W) and Fit Height (Shift+H) to the Zoom menu
- Improved the Copy/Move to Folder tool. Now you can press 1 to 9 to select a pre-defined destination folder
- Many other improvements and bug fixes
New in version 5.1
- Batch Rename supports all kinds of files if you select All Files (*.*) as the file filter
- Press +/- keys to zoom in/out animated gif files
- Fixed a bug causing the program to lose track of the current folder when exiting full screen mode
New in version 5.0
Added "Design and Print" (press Alt+P), which allows you to print multiple images with text and effects on one page
- Added option "Crop to Fit Full Screen" to the Slide Show tool
- Added larger thumbnail size (260 x 195 pixels) to the "Thumbnail" tab in the Settings (press F12)
- Added shortcut (Ctrl+Alt+A) for "Auto-Rotate based on EXIF Orientation Tag"
- Now it is possible to use the option "Do not resize if image is already smaller than requested size" when batch-resizing images based on one side
- Now you can tag or untag images even when the magnifier is activated
- Other small improvements and bug fixes
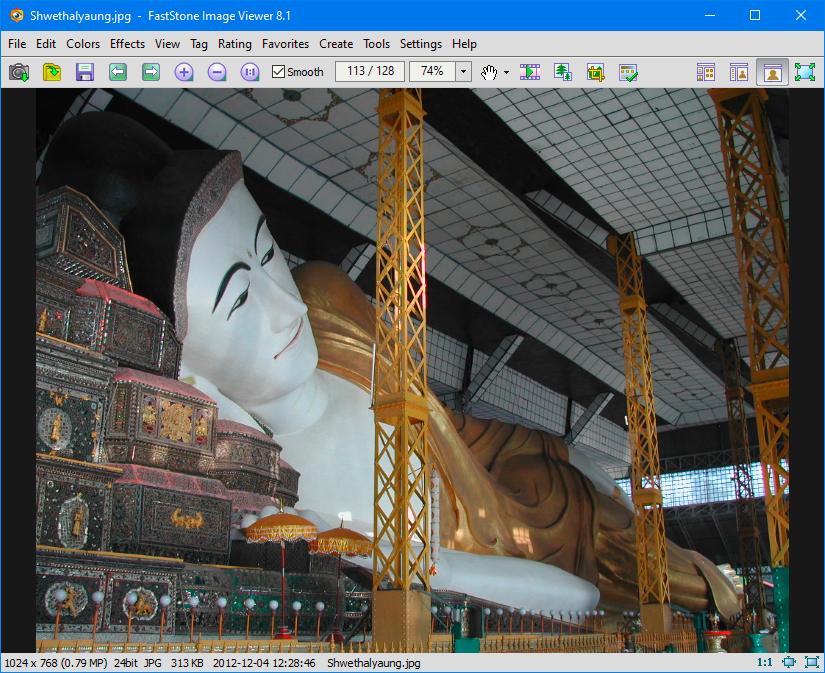
When you double-click on a thumbnail, the image is displayed without any toolbars cluttering the screen. The mouse cursor becomes a magnifying glass, which you can click to zoom in to the image, and drag to pan the zoomed image.
Move the mouse up to the top edge of the screen and a taskbar pops up for browsing to other images. On the left of the taskbar is a droplist, showing only the directories on your drive in which images are stored. On the right of the taskbar are icons for browsing and working with images, and below is a scrolling pane with thumbnails of the images in the current directory. Move the mouse back down, and the taskbar disappears. This saves time and reduces the risk of RSI.


 Move the mouse over the left edge of the screen and another taskbar pops up for modifying the image.
Choose from many options to save the image in different formats, copy it to another directory or drive, show a slide-show, or edit the image in another program (any installed program can be added to the menu).
Rotate, flip, or resize the image using one of several resampling methods.
Change the canvas size or crop the image.
Open the Text Board for adding notes and labels to the image, just as you can in FastStone Capture.
Adjust the brightness, contrast, or gamma of the image. Modify Hue, Saturation, or Lightness; reduce the number of colours, sharpen or smooth the image with a Gaussian blur. Adjust tonal ranges using the Histogram.
Apply any of the many special effects to the image. Add a vignette or drop-shadow, remove red-eye, convert the image to grayscale or sepia.
Undo and redo any of the actions you have applied, before saving the modified image under a new name. If you browse to another image, you will be asked if you wish to save any of the changes that you have made, unless you have already saved it as a new image.
 Mouse over the right of the window to show the image information taskbar. The top pane displays file information — filename, path, type, size, date/time, pixels and colour depth, and print size at the current resolution.
Digital camera users will find the EXIF details useful to display details of the camera settings in use when the picture was taken.
Since I don’t use a digital camera, I have added a JPEG comment to an image to show how the comment field can be used. This information is saved with the JPEG image and can be viewed in other programs such as IrfanView.
 Mouse over the bottom edge of the window to display another taskbar. This has a collapsible navigator for panning large images, and tools like those on the top taskbar for browsing and managing images. The tools from the left taskbar for cropping, resizing, and adding text to images are also available.
")
FastStone Viewer Settings
The F12 function key will bring up the settings dialog, where there are extensive options for configuring the image browser. The Thumbnail tab allows the user to define the size and layout for the thumbnails. Other tabs show options for the image viewer, the magnifier, JPG export quality, RAW Camera images, Dual monitors, Colour management, File Associations, Favourite directories, External programs for editing images, and the music to play during slide-shows.
Conclusions:
What I like most about FastStone is the careful thought that has gone into the interface design. No unnecessary mouse-clicks means that your work-flow is not being constantly interrupted to respond to dialogs. For example, the zoom tool in fullscreen mode — one tool does it all. Click to zoom in, move the mouse to pan, release the mouse to return to fullscreen.
Although the program is very feature-rich, it is not at all hard to learn. One barely needs to open the one page help or the seven page “documentation.” Tool-tips, clear icons, a choice of skins, and ergonomic design, ensure that new users will be up and running in a few hours, and fully conversant with the program within a week or two.
Released 29/12/2025
- Added HEIC and WEBP formats on Windows 10/11
- Filename template list is now editable
- Other minor improvements and bug fixes
Another useful free utility from FastStone. Though it doesn’t support as many image formats as IrfanView, it supports the most popular image formats — BMP, CUR, FAX, GIF, ICO, JFIF, JPG, JPEG2000, PCX, PNG, PPM, PSD, EPS, TGA, TIF, and WMF. It is dedicated to batch operations.

 The Settings dialog for each file format shows the output options available for that image format. For JPG images the compression quality can be set with the slider, or the compression of the original image can be used if possible.
The photometrics (colour space) and quality of colour subsampling can be chosen.
If the “progressive” option is checked, the image will be built up in several passes (useful for large images on slow connections as the user gets a quick preview before the whole image is downloaded).
IPTC and EXIF data can be retained, or discarded to reduce file size.
The other image formats each have similar options to select colour depth, compression quality, or to select transparency and interlacing where applicable. The BMP format can be RLE encoded, the PNG format can be compressed with Sub or Paeth filters, which may give better results with some images.
The file renaming feature offers flexible renaming options as shown in the dialog below:

It has a simple interface for selecting options for resizing, cropping, changing colour depth, etc. Enable a checkbox to enable each option to set its parameters. Save a group of options for reuse.

 Resize: The first option — In Pixels — is well suited to creating wallpaper images. Select from a range of common monitor sizes on the drop list or set custom values.
The “In Percentage” option can be used for resizing photographs to fit web pages or to reduce the size for emailing.
“Resize based on one side” lets you resize images based on the width, height, long side, or short side. Each option offers the wide range of resampling filters shown in the screen shot.
Rotate: Rotate the image 90° left or right, 180°, or Flip the image horizontally or vertically.
Crop: “In Pixels” is used to crop to standard screen sizes, centred on the image by default, or set a specific offset from the top left corner. “In Paper Size” will take account of the image’s resolution. “In Aspect Ratio” will crop images as large as the chosen aspect ratio permits.
Canvas: Increase the canvas size on any or all sides, or set a new size in pixels or as a percentage of the original image size.
Colour Depth: Select from a range of standard colour depths: 16.7 million (24-bit), 256 (8-bit), 128 (7-bit), 64 (6-bit), 32 (5-bit), 16 (4-bit), 8 (3-bit), 4 (2-bit), or 2 (1-bit).
Adjustments: Change brightness, contrast, and gamma; hue, saturation, and lightness; or red, green, and blue values. Convert the image to grayscale, negative, or sepia. Apply the changes before or after resizing if that option is also selected.
DPI: Set the image’s horizontal and vertical resolution.
Text: Add overlay text to the image, using variables for image Width, Height, File Name, File Date/Time, or EXIF data: Camera Make or Model, software, Date/time, Comment, Exposure Time, Exposure Program, Exposure Bias, F Number, Max Aperture, ISO Speed Ratings, Flash, Focal Length, 35mm Equivalent, or Metering Mode.
Watermark: Apply a watermark image with variable opacity to stamp the image with a custom image. Set the offset from any corner, or the centre of the image.
Border: Add 1, 2, or 3, frames and a drop shadow to create a picture frame border. Vary the width and colour of each frame, or create the frame within the current edges of the picture using transparency to let the image show through the frame.
Page last updated on 17 June 2026